
This blog will discuss a new component for Power Apps Model Driven Apps called Custom Page. In fact, this component joins the family of existing pages like Forms, Views and Dashboards. This new type of page is based on the Canvas Apps container and will surely add power, flexibility and a lot of possibilities to model driven apps.
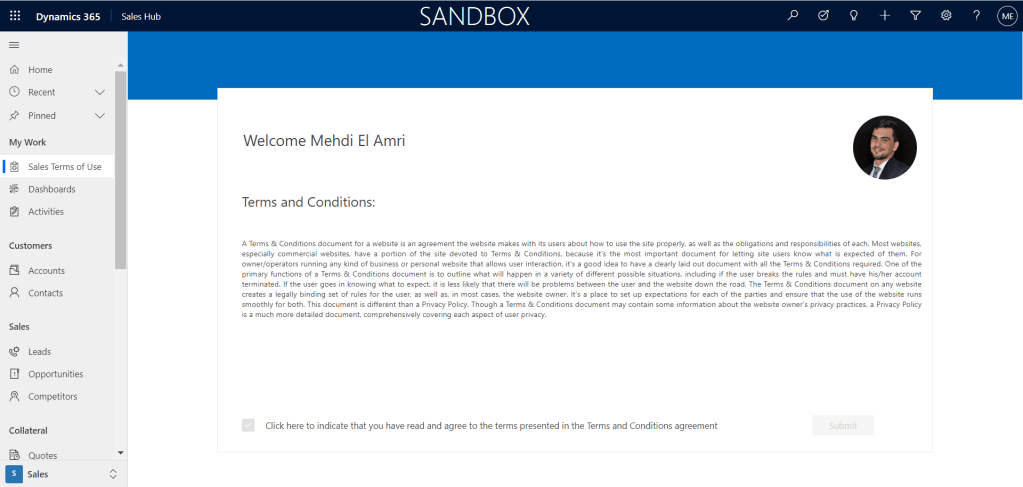
The images below shows the rendering of a Custom page from the Canvas App studio and from a model driven app.

Please note that the documentation for this new component is still in pre-release. You can have a look at it at the following link.
To discover this new type of page, I added a terms and conditions page that will be displayed at the first login of a user. Indeed, the goal is that the user will be able to access its features on the model driven app if and only if he has accepted the conditions of use.
The video below illustrates the scenario where the user can access and use the features of Dynamics 365 for Sales only after having agreed to the terms of use.
Demo:
How it works ?
For a better understanding of the proposed design. I will separate the scenario into three pieces. We start with the first step, where the user loads the application for the first time before he accepts the terms of use.
Step 1: (First use of the app)
- At the first use of the application, the user sees only the basic features of the application. Indeed, this is possible thanks to the security roles. In my case, I used the standard security role “Basic User”.
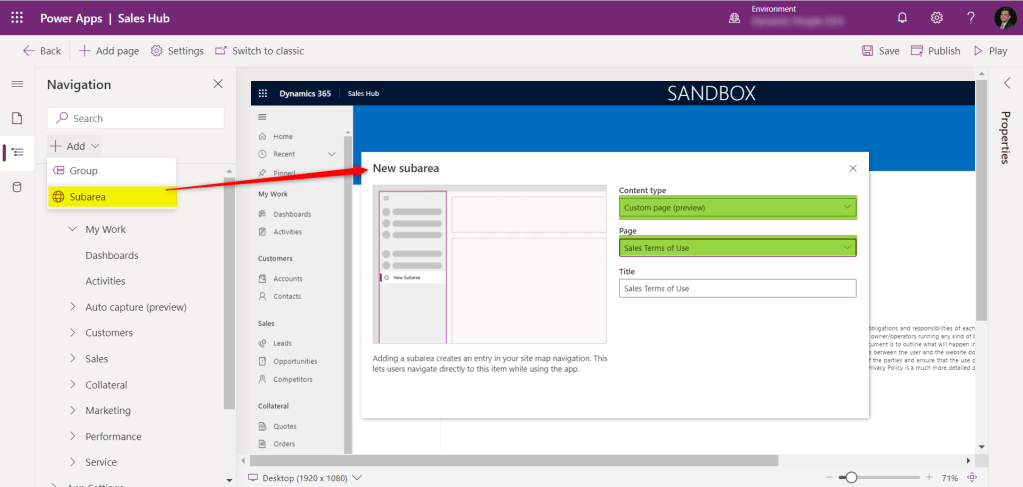
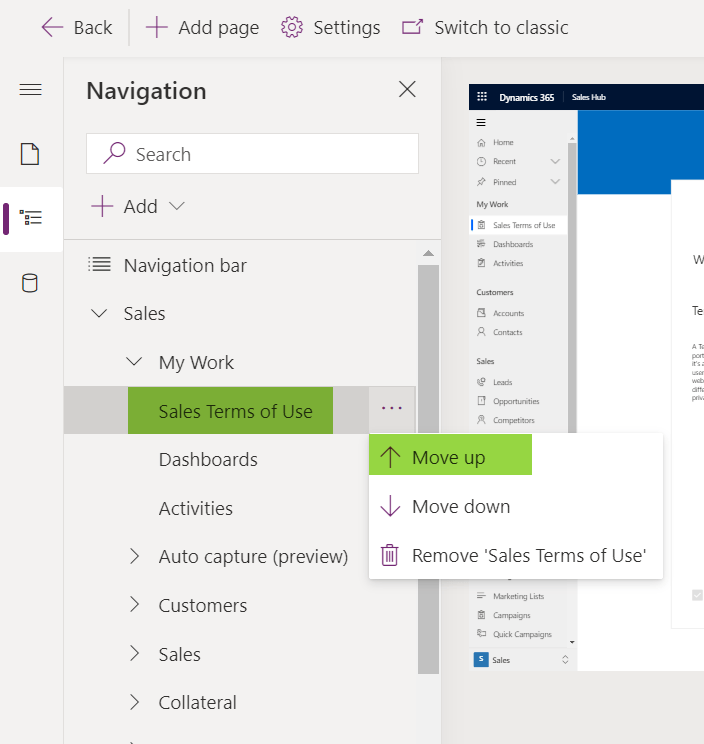
- The app displays the terms of use page as soon as it loads. This is achievable thanks to the MDA designer. Indeed, it is simply done by placing the Custom Page at the first subarea of the sitemap. The images below shows how to manipulate the custom page on the MDA designer.
At the time of writing this blog. Custom Page management is only available on https://make.preview.powerapps.com/

Step 2: (Accepting the usage terms)
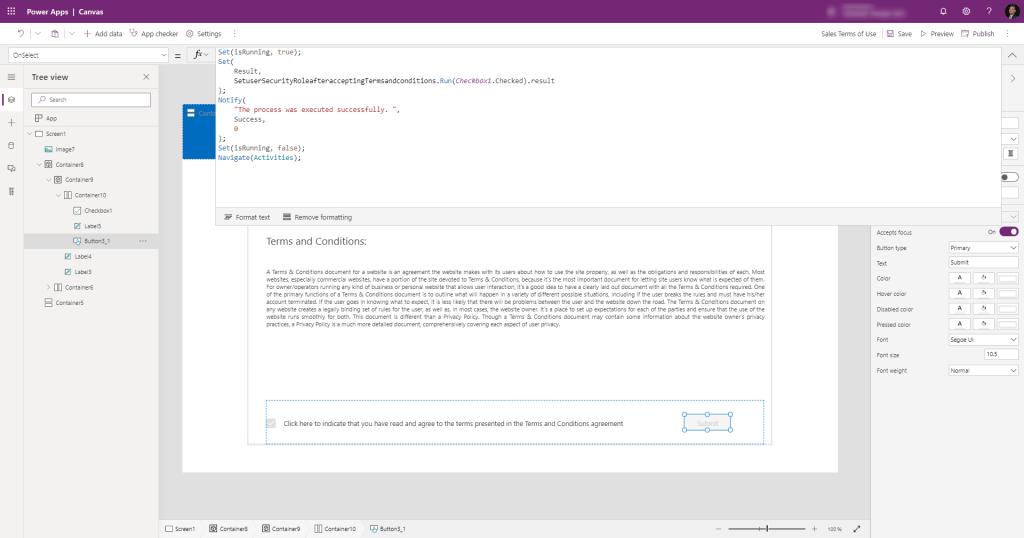
- To accept the terms of use, the user will tick the checkbox and press the submit button.
- Fluent UI controls are used by default. I was surprised by the final rendering of my page.
- The Canvas app (Custom Page) should be responsive, otherwise it will not be displayed properly when integrated on the MDA. I highly recommend reading this documentation to build responsive Canvas Apps.
- When the submit button is clicked, a flow is executed in the background that will assign the new security role to the user so that he can access all his features.
- You can refer to this blog to build this kind of Cloud Flow.
- The flow creates a task for the user that will ask him to refresh the browser so that he can take advantage of his new security role.
- This step was not planned. Indeed, I wanted to trigger a browser refresh from the Custom Page. Unfortunately, I didn’t find a way to do this using the PowerFx commands that are used to trigger navigation.
- As this cannot be done automatically, a task will be assigned to the user to refresh his browser.
- While the flow is running, a spinner is displayed on the screen.
- In order to know that the flow execution is completed. A response will be sent to the Canvas Apps.
- The Canvas App will display a spinner before receiving a response from the flow. You can refer to this blog if you can to build a spinner and use it in your apps.
- At the end of the flow execution, the custom page triggers a navigation on the MDA to the activity view.
- Custom pages use PowerFx commands to interact with the host model driven app.
- You can find some examples in the following documentation.
Below are the commands triggered by clicking on the Submit button:
Set(isRunning, true);
Set(
    Result,
    SetuserSecurityRoleafteracceptingTermsandconditions.Run(Checkbox1.Checked).result
);
Notify(
    "The process was executed successfully. ",
    NotificationType.Success,
    0
);
Set(isRunning, false);
Navigate(Activities);
Step 3: (Using the app)
- After accepting the terms of use. The custom page must be in read-only mode. This approach will prevent the terms of use from being accepted more than once.
- This approach was not my first option.
- Indeed, I wanted to hide the custom page from the navigation menu according to the privileges of the security role of the current user. Unfortunately, this is not yet achievable on the MDA designer.
- In my demo, a user who has already accepted the terms of use corresponds to a user who has a certain security role. This match is for demonstration purposes only. In another context, we might use a field on the User entity to make this match.
- I used a solution proposed on this blog to check the security roles of the connected user.
Below are the commands to initiate the global variables when loading the application. These variables will be used to implement the read-only mode in the custom page. I use
Set(isRunning, false );
ClearCollect(UserRoles,(LookUp(Users,domainname=User().Email).'Security Roles (systemuserroles_association)').Name);
If(IsBlank(LookUp(UserRoles,Name="System Administrator")),Set(isAccepted, false ),Set(isAccepted, true ));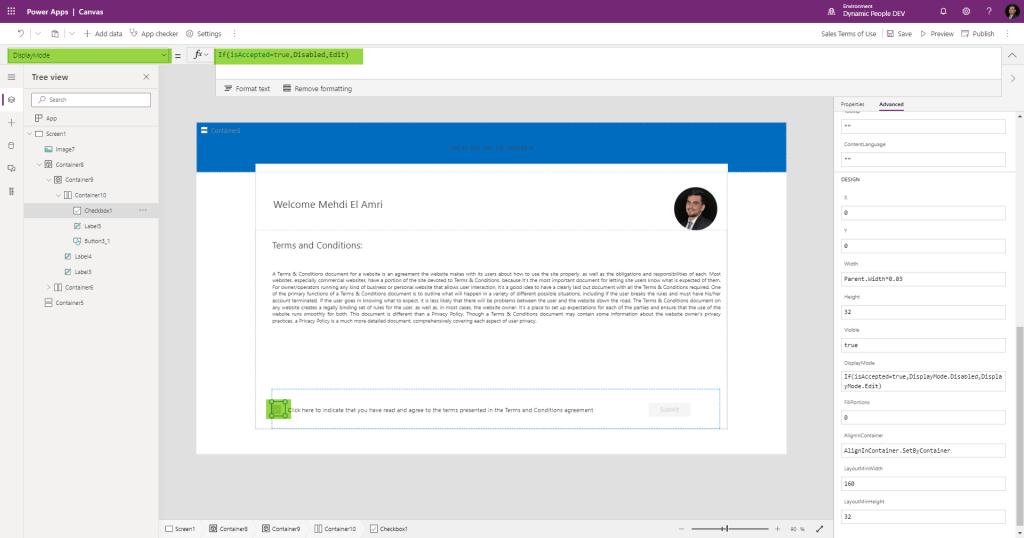
Summary:
The new Custom Page component is a tool that will allow us to realize requirements that require code like HTML, JavaScript and CSS or maybe an SPA using React.
The mix of Model Driven App and Canvas App will further accelerate the development of new business processes and will also give more agility and faster adaptability to enterprise business processes.
The above blog demo did not show all the capabilities of this new component, such as using the component as a dialog. This capability will enable us to build dialogs quickly and without code.
Hope it helps…

Set(
Result,
SetuserSecurityRoleafteracceptingTermsandconditions.Run(Checkbox1.Checked).result
);
Could you explain this code, what is result and the setuser… , where do you use these?
LikeLike